B2 Fireball speeds up your initial Arq backup
If you’ve got TBs of data to back up with Arq to Backblaze B2 cloud storage then their Fireball service might be just the thing for you. It’s a 96TB Synology NAS with 1GigE and 10GigE network connections. They send it to you, you fill it up and send it back, and they ingest the data into B2. If you’ve got a lot of data and not a lot of bandwidth, then Fireball will get your initial backup done more quickly. Backblaze charges $550 monthly rental, a $75 shipping fee, and a $3,000 refundable deposit for Fireball.
Keys to Success
It’s quite straightforward to use Fireball with Arq as long as you follow these 2 rules:
- Make sure you set your B2 bucket’s lifecycle policy to “keep only the last version of the file”. Actually this is true whenever you back up to B2 with Arq, not just if you’re using a Fireball.
- When you back up to the Fireball NAS with Arq, you have to back up to the NAS share, not a folder within it. Otherwise Arq can’t see or work with the data when it gets to B2.
Populate a Fireball With Arq
- Sign into backblaze.com and click the “Fireball” link on the left to order your Fireball.
- When the Fireball arrives at your door, set it up as described in steps 1-7 of the Fireball setup document:
- Unpack it and plug it in.
- Connect it to your network.
- Download and install the Synology Assistant on your PC or Mac.
- Double-click on the Fireball in Synology Assistant to log into it.
- Go to Control Panel -> Shared Folder – DataForB2 and mount it using the encryption key provided by Backblaze.
- Find the Fireball in your local network (go to \\fireball in Windows Explorer, or go to the Finder and click Go -> Connect to Server and enter “fireball” on Mac).
- Mount the share DataForB2. Enter the username and password provided by Backblaze.
At this point the Fireball is mounted as a network share. The next step is to configure Arq to back up to it.
- Open Arq and pick “Preferences” from the menu. Click on the Destinations tab. Click the button to add a destination.
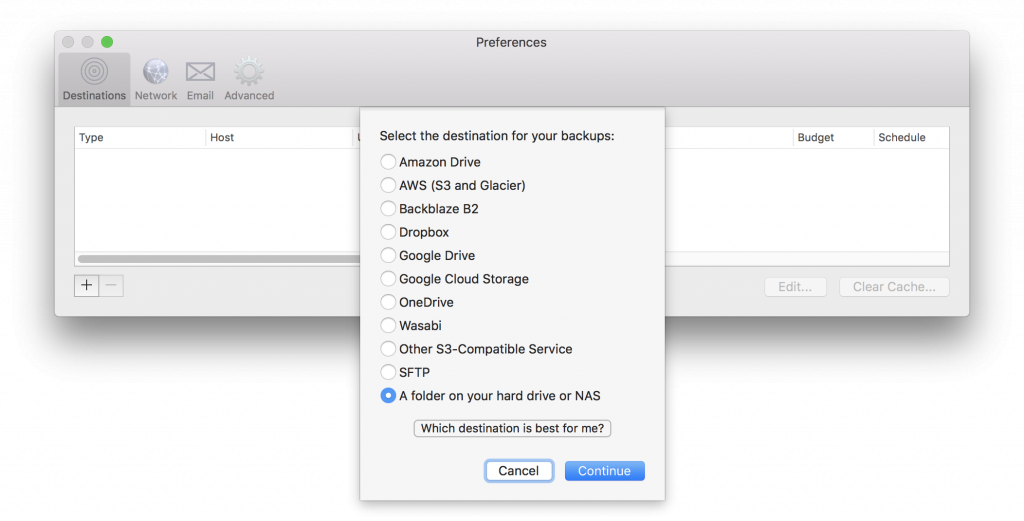
- Choose the destination type “A folder on your hard drive or NAS”.
- Select the “DataForB2” network share.
NOTE: The destination in Arq must be the root of the network share, not a directory within it.
Close Arq’s preferences window.
Pick “Add Folder to Backups” from Arq’s menu to add the folder(s) you want backed up. You’ll be prompted to choose an encryption password for your backups when you add the first folder. Write your password down somewhere so you don’t lose it! We can’t help you decrypt your data if you lose it.
Pick “Back Up Now” from Arq’s menu to start the backup. Wait for it to finish.
Remove the Folder Destination in Arq
We’ve finished the initial backup to the Fireball and we’re going to ship it to Backblaze, so let’s remove the destination in Arq.
- Open Arq and pick “Preferences” from the menu. Click on the Destinations tab.
- Click on your folder destination and click the button to remove it.
Configure Cloud Sync on the Fireball
Follow steps 9-12 in the Fireball setup document to configure Cloud Sync on the Fireball with your B2 account ID/key and your bucket.
NOTE: Make sure the bucket you choose has a lifecycle policy of “keep only the last version of the file“. Log into backblaze.com, click on Buckets on the left, then click on the “Lifecycle settings” link next to your bucket. Click “keep only the last version of the file” is selected and click “Update Bucket”.
Send the Fireball to Backblaze
Follow step 13 in the Fireball setup document to send the Fireball to Backblaze.
When Backblaze receives the Fireball, the Backblaze folks will connect it to their network and finish ingesting the data to your bucket. They’ll let you know when it’s complete.
Configure Arq to Use the B2 Data
Now that your backup set is uploaded to B2, let’s point Arq at it so that Arq uses the B2 backup set from now on.
- Open Arq and pick “Preferences” from the menu. Click on the Destinations tab.
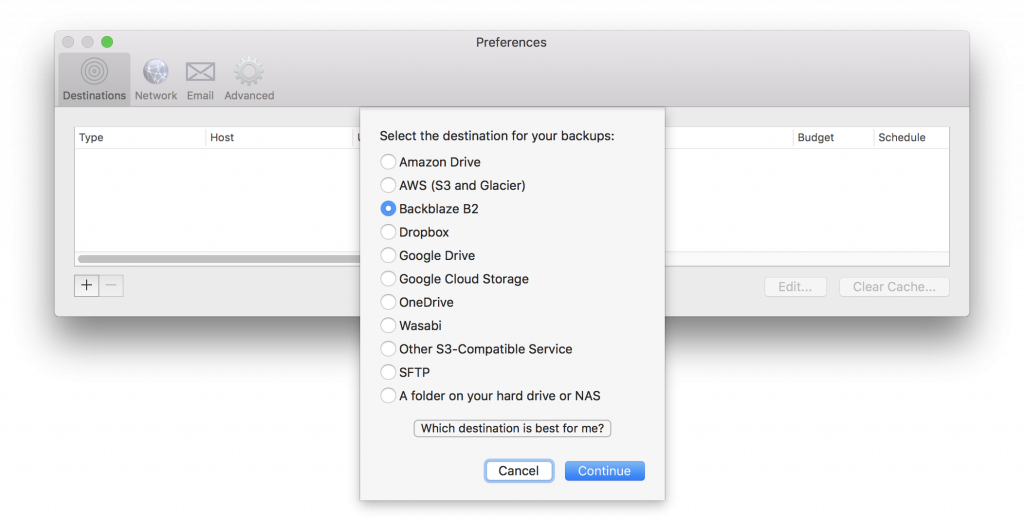
- Click the button to add a destination. Choose the destination type “Backblaze B2”.
- Enter your B2 application ID/key pair and click Continue.
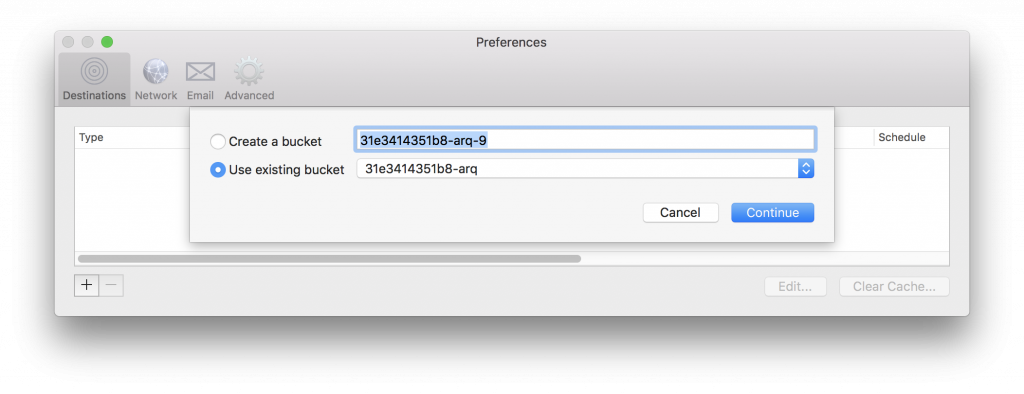
- Choose the bucket you used with the Fireball and click Continue. Your B2 destination will be listed in the preferences window. Close the preferences window.
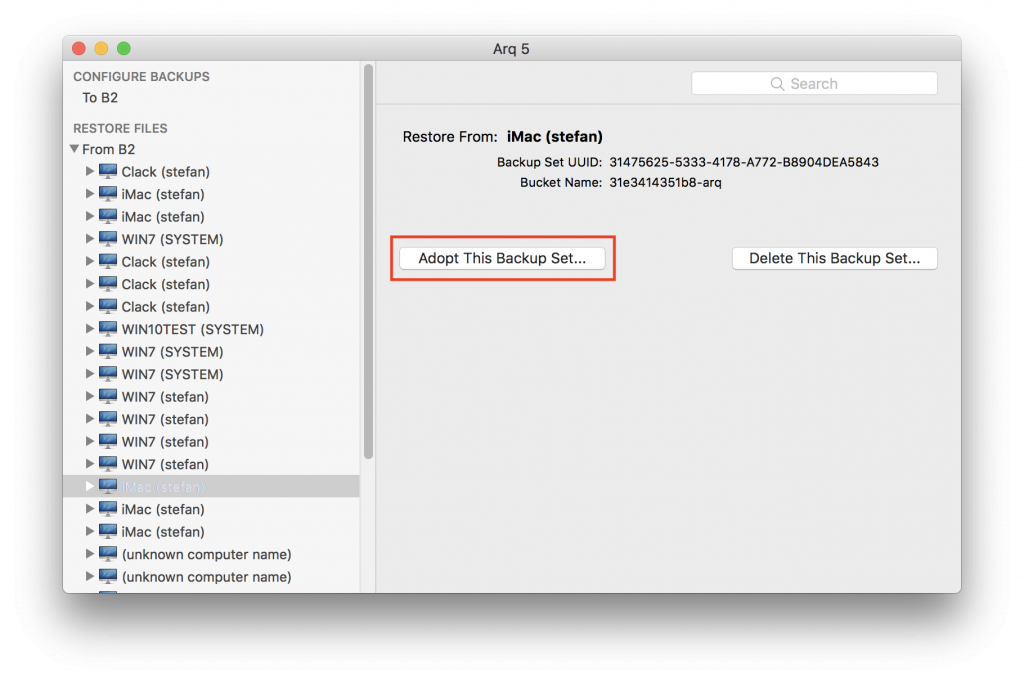
- In the Arq main window, under “RESTORE FILES”, click on your computer and click the “Adopt This Backup Set” button on the right to connect Arq with the backup set that’s now in your B2 bucket.
That’s it! By default Arq will back up every hour to your B2 bucket (double-click on your destination in the preferences to change the schedule if you’d like).
As always, if you have questions please email us at support@arqbackup.com. We’re always ready to help out.